- Details
- Written by Super User
- Category: Demo Info
- Hits: 4221
Image and Content Fader Description Text:

<span class="center">
<span class="center_text slide_text whiteline">
<span class="iacf_subtext">The Finest in Gourmet</span>
<br>
<a href="#s5_bottom_row1_area1" class="readon">Book a Table</a> <a class="readon nostyle" href="#s5_bottom_row2_area1">Order Food</a> </span>
<span class="center_text slide_text whiteline">
<span class="iacf_subtext">The Finest in Gourmet</span>
<br>
<a href="#s5_bottom_row1_area1" class="readon">Book a Table</a> <a class="readon nostyle" href="#s5_bottom_row2_area1">Order Food</a> </span>
Contact Info, Time Info and Location published to "custom_1" position:
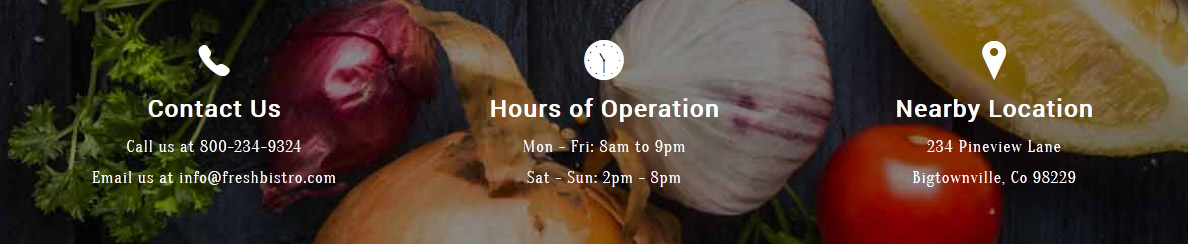
<div id="s5_contact_hours_near">
<div class="s5_wrap">
<div class="overlay_outer three">
<div class="overlay_inner">
<div class="overlay_hover_outer">
<span class="ion-ios-telephone chn"></span>
<span class="chn_title">Contact Us</span>
<br>
<span class="highlightfont2 chn">Call us at 800-234-9324<br>
Email us at [email protected]</span>
</div>
</div>
</div>
<div class="overlay_outer three">
<div class="overlay_inner">
<div class="overlay_hover_outer">
<span class="ion-ios-time chn"></span>
<span class="chn_title">Hours of Operation</span>
<br>
<span class="highlightfont2 chn">
Mon - Fri: 8am to 9pm<br>
Sat - Sun: 2pm - 8pm</span>
</div>
</div>
</div>
<div class="overlay_outer three">
<div class="overlay_inner">
<div class="overlay_hover_outer">
<span class="ion-ios-location chn"></span>
<span class="chn_title">Nearby Location</span>
<br>
<span class="highlightfont2 chn">234 Pineview Lane<br>
Bigtownville, Co 98229</span>
</div>
</div>
</div>
</div>
</div>
Testimonials:
This is the code used for the testimonials area that is published to the first 3 tab show positions: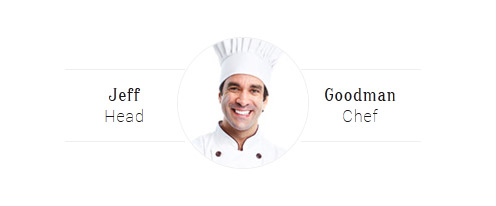
<div class="s5_test_surroundbox">
<div class="s5_test_leftbox">
<span class="highlightfont2 testsize">Jeff</span> <br/>
Head
</div>
<div class="s5_test_centerimg">
<img src="images/chef1.jpg" alt=""/>
</div>
<div class="s5_test_rightbox">
<span class="highlightfont2 testsize">Goodman</span><br/>
Chef
</div>
</div>
<div class="s5_test_leftbox">
<span class="highlightfont2 testsize">Jeff</span> <br/>
Head
</div>
<div class="s5_test_centerimg">
<img src="images/chef1.jpg" alt=""/>
</div>
<div class="s5_test_rightbox">
<span class="highlightfont2 testsize">Goodman</span><br/>
Chef
</div>
</div>
Big Text Areas:
This is the code used and published to the big text area positions (which are all custom positions, custom_3, custom_4 and custom_6).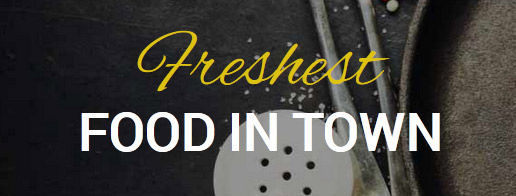
<br/><br/>
<span class="highlightfont highlightcolor1 bigfont">Freshest</span>
<span class="bigfont_lower uppercase" style="color:#fff;">Food in Town</span>
<br/><br/>
<span class="highlightfont highlightcolor1 bigfont">Freshest</span>
<span class="bigfont_lower uppercase" style="color:#fff;">Food in Town</span>
<br/><br/>
Multibox Images:
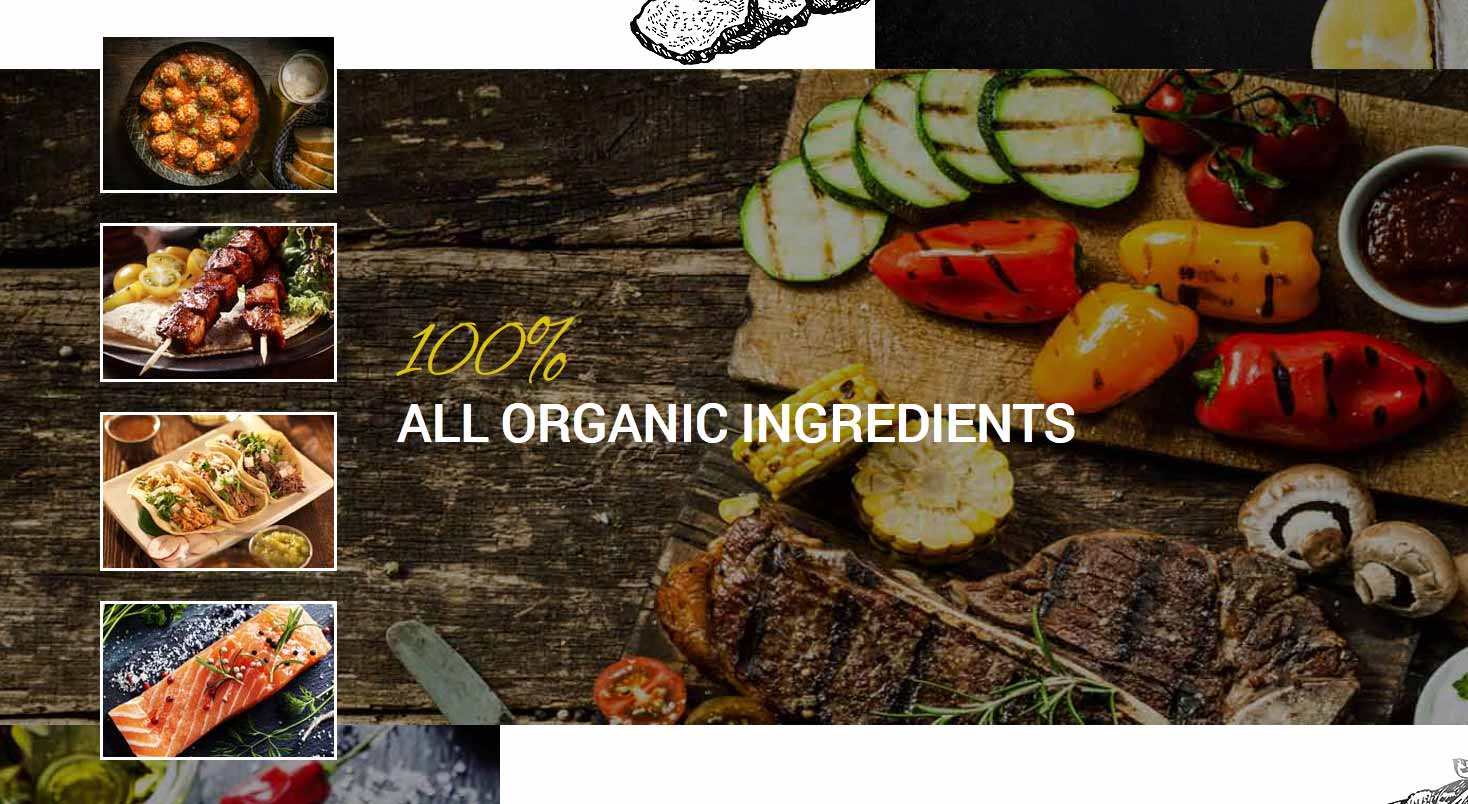
<div class="s5_100om_left">
<div class="s5_100om_left_inner">
<a title="Tasty Meatballs" class="s5mb" id="mb2" href="images/image1_lrg.jpg" rel="[me]">
<img src="images/image1.jpg" class="boxed_white" alt="" data-sr="wait 0.1s, enter left, hustle 20px"/>
</a>
<br/>
<a title="Shish Kabobs" class="s5mb" id="mb2" href="images/image2_lrg.jpg" rel="[me]">
<img src="images/image2.jpg" class="boxed_white" alt="" data-sr="wait 0.2s, enter left, hustle 25px"/>
</a>
<br/>
<a title="Tacos" class="s5mb" id="mb2" href="images/image3_lrg.jpg" rel="[me]">
<img src="images/image3.jpg" class="boxed_white" alt="" data-sr="wait 0.3s, enter left, hustle 30px"/>
</a>
<br/>
<a title="Salmon" class="s5mb" id="mb2" href="images/image4_lrg.jpg" rel="[me]">
<img src="images/image4.jpg" class="boxed_white" alt="" data-sr="wait 0.4s, enter left, hustle 35px"/>
</a>
</div>
<div class="s5_100om_right_inner">
<span class="highlightfont highlightcolor1 bigfont">100%</span>
<span class="bigfont_lower uppercase">All Organic Ingredients</span>
</div>
<div style="clear:both;"></div>
</div>
Menu Image:
This is the code for the menu that is published to the tab show:
<span class="menu_title_cat">Entrees</span>
<span class="menu_item_title highlightfont2">Sultanâ??s Steak</span><br>
<span class="highlightfont2 pricespacing">$55.00</span>
<br>
<span class="menu_item_title highlightfont2">Blackened Chicken in Brick Oven</span><br>
<span class="highlightfont2 pricespacing">$45.00</span>
<br>
<span class="menu_item_title highlightfont2">Fillet Steak</span><br>
<span class="highlightfont2 pricespacing">$65.00</span>
<br>
<span class="menu_item_title highlightfont2">Grilled Kofte Balls</span><br>
<span class="highlightfont2 pricespacing">$35.00</span>
<br>
<span class="menu_item_title highlightfont2">Rosemary Herb Chicken</span><br>
<span class="highlightfont2 pricespacing">$49.99</span>
<br>
<span class="menu_item_title highlightfont2">Shrimp Salad</span><br>
<span class="highlightfont2 pricespacing">$24.99</span>
<br>
<span class="menu_item_title highlightfont2">Double French Lamp Chops</span><br>
<span class="highlightfont2 pricespacing">$62.00</span>
<br><br>
<a class="readon menubutton" href="#">View Full Menu</a>
Tab Show Icons:
The icons for the tab show are ion icons and you just simply add the below code to the button text label area in the admin of the tab show.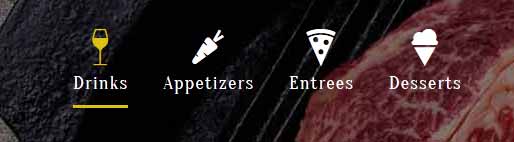
<span class="ion-ios-wineglass tabshowicons"></span>Drinks
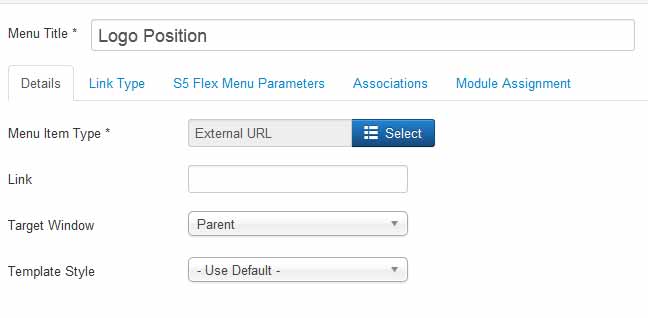
Centered Logo
In this design we have for the first time included a centered logo within the main menu. To do so we had to add some JavaScript and custom CSS. Below is a screenshot of the logo as seen on the site and following it is a small tutorial to guide you on how to set this up.
1. The first step to create the centered logo is to create an external link menu item and publish it between all your other menu items. To get it centered at a good spot you may have to reword or add/remove a menu item since the logo is just another menu item itself. It works best when you have an even amount of menu items so that you can just stick the logo right in the middle of them. Below is a screenshot of this first step under the Joomla menu manager area.
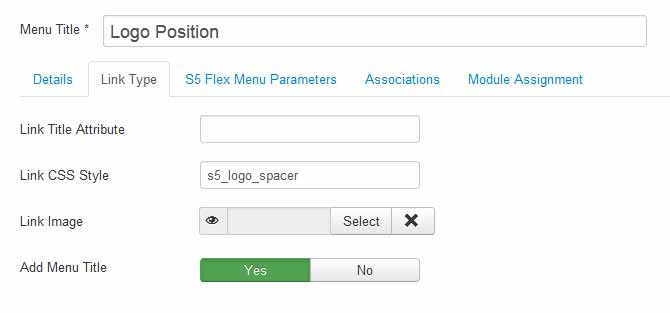
2. The next step is to click the tab "link type" and enter in the CSS class for the logo so the design knows where to position your logo. So enter in the class "s5_logo_spacer" as shown below:
3. We recommend using a custom HTML module and publishing it to the "logo" position vs just using the built in logo method that we include with our designs. (this will allow us to show a dark image for the floating menu). So in your custom module you will enter the following:
<div class="s5_sitelogo"> </div>
4. Next you may need to edit the width and height of your logo here:
template.css (line 640)
.s5_sitelogo {
background: url("../images/s5_logo.png") no-repeat scroll 0 0 rgba(0, 0, 0, 0);
color: #ffffff;
height: 114px;
width: 216px;
}
.s5_sitelogo {
background: url("../images/s5_logo.png") no-repeat scroll 0 0 rgba(0, 0, 0, 0);
color: #ffffff;
height: 114px;
width: 216px;
}
The dark logo CSS (for the floating menu) and definition can be found here:
template.css (line 647)
.s5_wrap_fmfullwidth .s5_sitelogo {
background: url("../images/s5_dark_logo.png") no-repeat scroll 0 0 rgba(0, 0, 0, 0);
color: #ffffff;
height: 114px;
width: 216px;
}
.s5_wrap_fmfullwidth .s5_sitelogo {
background: url("../images/s5_dark_logo.png") no-repeat scroll 0 0 rgba(0, 0, 0, 0);
color: #ffffff;
height: 114px;
width: 216px;
}
5. Lastly we have the widths of the actual menu item where the logo is placed. These also may need to be adjusted. We highly recommend using Firebug for Firefox or a similar tool in order to see what CSS you need to edit.
template.css (line 689)
#s5_menu_wrap_top .s5_logo_spacer {
text-indent: -999999px;
width: 234px;
}
template.css (line 697)
#s5_nav li.s5_logo_spacer {
height: 103px;
margin-left: 20px;
margin-right: 20px;
margin-top: -41px;
padding-top: 42px;
}
#s5_menu_wrap_top .s5_logo_spacer {
text-indent: -999999px;
width: 234px;
}
template.css (line 697)
#s5_nav li.s5_logo_spacer {
height: 103px;
margin-left: 20px;
margin-right: 20px;
margin-top: -41px;
padding-top: 42px;
}
Add to Carts:
This is the code used for the add to cart button sections on the homepage published to the tab show. Notice the "four" in the top DIV below. This can be changed to two through six if you need to add or remove items in a row: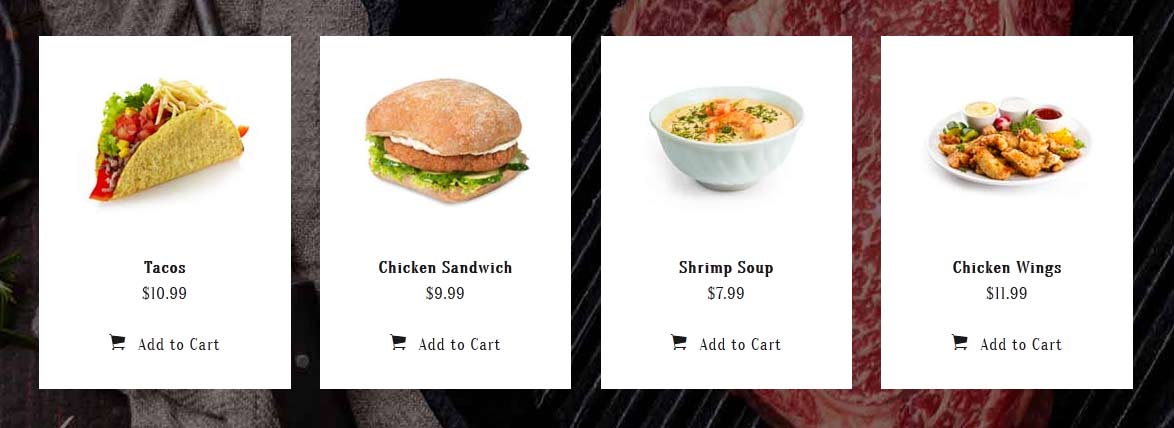
<div class="overlay_outer four">
<div class="overlay_inner">
<div class="order_white">
<a id="mb2" class="s5mb" rel="[me]" href="images/tacos_lrg.jpg" title="Tacos">
<img src="images/tacos.jpg" alt="tacos" width="192" height="161" />
</a>
<br/><br/>
<span class="highlightfont2"><span class="menu_item_title">Tacos</span><br/>
$10.99</span>
<br/>
<a href="#" class="s5_addtocart snipcart-add-item"
data-item-id="1"
data-item-name="Tacos"
data-item-price="10.99"
data-item-url="http://www.shape5.com/demo/fresh_bistro/1"
data-item-description="Tacos">
<span class="ion-ios-cart sized"></span>
Add to Cart
</a>
</div>
</div>
</div>
- Details
- Written by Super User
- Category: Demo Info
- Hits: 44052

- Details
- Written by Super User
- Category: Demo Info
- Hits: 3058
The styling of the module shown here is customized specifically for this template with css overrides, and cannot be used with any other template. The same module can be used on any template, but with default or other styling in its place.
Menu Features:
- Mail is sent directly through the Joomla mail function, defined under the Joomla globlal configurations. This means the mail can send through direct php mail functions or through SMTP authenticaion.
- In addition to the Name and Email fields, you can set up to ten customized fields (all completely optional). These fields can be a regular text input, a full textarea, drop down select, or a date selection field.
- Set any custom field to either required and not required.
- The styling of each input, textarea, and button is controlled by common Joomla classes, so it will match your template out of the box. The styling shown on this demo is specific to this template using the mentioned classes.
- In addition to the default class names you can also set widths, paddings, and margins.
- Predefine a subject or let the user enter their own.
- You can customize all error messages to any text or language that you would like directly from the module's backend.
- Set the wording for all fields to any words or language that you would like, eg: Name, Email, Phone, etc.
- There are multiple layers of spam protections. The first is done by the built in captcha methods, that you can enable or disable. The second is automatic, the script will automatically detect mail headers to prevent spammers. Third, you can enter up to 30 word exclusions that you do not wants your users submitting.
- Details
- Written by Super User
- Category: Demo Info
- Hits: 2909
Round icon example:
<div class="icon_outer_wrap">
<div class="icon_hover">
<a href="" class="ion-link icon_element"></a>
</div>
<div class="icon_non_hover">
<span class="ion-headphone icon_element"></span>
</div>
</div>
<div class="icon_hover">
<a href="" class="ion-link icon_element"></a>
</div>
<div class="icon_non_hover">
<span class="ion-headphone icon_element"></span>
</div>
</div>
Icon Examples:
<span class="ion-camera" style="display:
inline-block;font-size:2.5em;"></span>
- Details
- Written by Super User
- Category: Demo Info
- Hits: 2566
Example of this in action (refresh this page if you didn't see it already):
Enter from the left and move up 50px in 1.33 seconds.
Enter from the bottom after 1 second.
Wait 2.5 seconds and then ease-in-out 100px.
Code used for the above:
<div data-scroll-reveal="enter left and move 50px over 1.33s"> Enter from the left and move up 50px in 1.33 seconds. </div>
<div data-scroll-reveal="enter from the bottom after 1s"> Enter from the bottom after 1 second. </div>
<div data-scroll-reveal="wait 2.5s and then ease-in-out 100px"> Wait 2.5 seconds and then ease-in-out 100px. </div>
<div data-scroll-reveal="enter from the bottom after 1s"> Enter from the bottom after 1 second. </div>
<div data-scroll-reveal="wait 2.5s and then ease-in-out 100px"> Wait 2.5 seconds and then ease-in-out 100px. </div>